Water is the most important fuel for the human body – it makes up more than 60% of our weight and is involved in virtually all metabolic processes. When fluid levels drop by just two percent, it negatively affects cognitive functions, muscle performance, and mood. Yet, water is often an underestimated part of outdoor gear. In a backpack, we often find technical jackets worth thousands, but we solve hydration with just a regular PET bottle, which throws off the center of gravity, sloshes, and gets in the way.
A hydration bladder elegantly solves the problem. A soft plastic reservoir stored directly on your back saves time, space, and ultimately, weight. You reach for the tube, bite the mouthpiece, and drink without slowing down. This significantly reduces the risk of dehydration, and from our own experience, we know that anyone who tries a hydration bladder rarely goes back to a regular bottle.
In this guide, you will learn:
- how a hydration bladder works and what it consists of;
- which parameters are key in selection and why;
- what volume to choose for activities of different lengths;
- how the material affects the taste of water, weight, and lifespan;
- practical tips for cleaning, storage, and maintenance;
- the most common mistakes beginners make and how to avoid them.
We firmly believe that after reading this article, you will have a clear idea and will purchase a hydration bladder that will last for many years, kilometers, and falls.
Contents:
- Why Get a Hydration Bladder
- How a Hydration Bladder Works
- Key Parameters for Choosing a Hydration Bladder and Accessories
- Hydration Bladder by Sport
- What to Watch Out for in Practice
- Care, Cleaning, and Maintenance – A Detailed Guide
- The Most Common Mistakes
- FAQ – Frequently Asked Questions
- Glossary of Terms
- Summary & Recommendations for Choosing a Hydration Bladder
Why Get a Hydration Bladder
A hydration bladder is not just a fashion trend for elite runners. On the contrary – anyone who doesn't want to be bothered with fishing a bottle out of a side pocket of their backpack while moving outdoors will appreciate it. Below we summarize the most important reasons why an investment of a few hundred crowns will pay off on the very first longer hike.
Uninterrupted Movement
Stopping for sips from a bottle has two disadvantages: the body gets fluids in large intervals and your pace fluctuates. Hydration bladders support so-called sip-drinking – small, regular sips that the body absorbs better and that don't throw an athlete off their rhythm.
Ergonomics and Stability
A liter of water weighs about a kilo. If you carry it in a side pocket, every step or push sways the backpack from side to side. In a hydration bladder pocket, the so-called hydration sleeve, the reservoir lies closest to the center of gravity, which remains stable, something you'll appreciate especially on technical terrain and when running downhill.
Space and Weight Savings
A soft bladder shrinks as the volume decreases, so no dead space is left in the backpack. A modern TPU bladder weighs around 150g, while two one-liter aluminum or plastic bottles with screw caps can easily exceed 300g.
Motivation to Drink
Psychologically, a tube hanging right by your mouth is a gentle reminder: "Drink up!" A systematic meta-analysis by Holland et al. (2017) showed that cyclists who regularly replenished fluids with a tube (≈ 0.15–0.20 ml·kg⁻¹·min⁻¹) during a 1–2 hour ride improved their performance by an average of 2%. On longer rides of two hours or more, the difference increased to as much as 3%.
How a Hydration Bladder Works
A hydration bladder consists of three basic parts: the reservoir, the tube, and the valve. The reservoir is made of a flexible, health-safe plastic that resists pressure and folding. A detachable tube runs through an outlet in the backpack to the shoulder strap, where it is held by a magnet or a loop. The flow of water is triggered by a light bite on the bite-valve with your teeth – when the silicone is released, the valve closes and water does not flow back.
Did you know... the idea for the hydration bladder was born in 1989 when paramedic Michael Eidson, during the Hotter'N Hell Hundred cycling race in Wichita Falls, Texas, filled a medical IV bag with water, hid it in a sock, and tucked it into the back pocket of his jersey? This improvisation became the basis for the first commercial model, the CamelBak ThermalBak, which was launched a few months later.
Modern bladders add quick-release connectors for easy tube detachment, antibacterial treatments on the walls, and, in winter versions, padded neoprene sleeves that delay water freezing by up to 45 minutes.
Key Parameters for Choosing a Hydration Bladder and Accessories
Volume
"So how many liters do I need?" The table will give you a hint, but take it as a guide. Extra water is never a bad thing, especially if you have a source to refill it.
| Activity | Duration | Temperature | Recommended Volume |
|---|---|---|---|
| Running up to 10 km | <1.5 h | <20 °C | 0.5–1 L |
| Trail running up to 25 km | 1.5–3 h | 15–25 °C | 1–1.5 L + soft-flask |
| Mountain biking – half-day ride | 3–4 h | 15–30 °C | 1.5–2.5 L |
| Two-day trek – mountain range | 6–8 h/day | variable | 2–3 L + filter |
| Ski touring / winter hike | 4 h | <0 °C | 1.5–2 L of warm water |
Tip and a quick equation: body weight x 0.03 = liters of daily minimum during exertion in a temperate climate.
Hydration Bladder Materials
| TPU (Thermoplastic Polyurethane) | PEVA (Polyethylene Vinyl Acetate) | Silicone | |
|---|---|---|---|
| Water Taste | neutral | slightly plastic | completely neutral |
| Weight | medium | lowest | higher |
| Temperature Range | −20 °C to +80 °C | 0 °C to +60 °C | −40 °C to +100 °C |
| Filling Lifespan | ≈ 600 | ≈ 300 | > 1000 |
| Price | $$ | $ | $$$ |
Tip: More than the taste of the material itself, the aftertaste is affected by imperfect cleaning. A thoroughly rinsed TPU bladder tastes better than a silicone one that's been sitting musty in a car for a month.
For most recreational athletes, the optimal compromise is a hydration bladder made of thermoplastic polyurethane – it is lightweight, durable, and taste-neutral. Silicone is worthwhile if you often do sports in the cold or require maximum durability.
Filling Opening
Roll-top closures with a sliding clip dominate due to their easy handling and the ability to drop a handful of ice into the bladder. Screw-on lids are usually sealed with an EPDM gasket and are suitable for dusty environments as they don't easily get clogged with dust and mud.
Tube and Valve
OutdoorGearLab found in its comparative tests that valves with a higher flow rate significantly facilitate drinking, while too fast a flow leads to splashing and unnecessary water consumption; therefore, it is recommended to choose a medium-sized valve with a balanced flow.
When buying, focus on:
- Valve cover – protects from dust and mud, but sometimes gets lost during dynamic activities.
- Magnet vs. clip – a magnet is faster, a clip is less prone to falling off.
- Tube length – once you cut the tube, you can't lengthen it; it's better to buy a longer one and measure twice or even three times before shortening.
- Neoprene sleeve – a dark cover limits the penetration of daylight into the tube. The water heats up less, and microorganisms that like light (algae, bacteria) do not settle inside.
Compatibility with Backpacks
Almost every running, hiking, or cycling backpack today includes a hydration sleeve, but not every sleeve can accommodate a three-liter, filled bladder. When trying it out in a brick-and-mortar store, ask the salesperson to stuff the inside of the backpack with a light blanket or a weight of about 2–3 kg. This filling simulates normal contents and will help reveal if the empty reservoir wrinkles in the hydration sleeve, pushes against the back panel, and if the tube sticks out from the strap.
Maintenance and Cleaning
When analyzing complaints, it can be said that 9 out of 10 problems with hydration bladders stem from irregular maintenance. The basic question is: "Would you let a child drink from a bladder cleaned this way? If you hesitate, the bladder is not clean enough."
- Rinse immediately after using an electrolyte drink – sugars are a breeding ground for mold.
- Thoroughly dry the bladder once every two weeks.
- Use a disinfecting tablet once a month (it costs a few pounds).
Safety and Health
Quality manufacturers declare BPA/PVC free as a matter of course. More advanced bladders contain an antibacterial treatment; this prevents the growth of bacteria and reduces biofilm formation.
Price vs. Quality
The price difference between the cheapest and a premium bladder can be threefold, but if you use a hydration bladder three times a week, it's worth paying extra for quality material, guaranteed compatibility of spare parts, and longer service support. With cheap models, a replacement valve is often unavailable after a season, and you have to buy the whole set.
Hydration Bladder by Sport
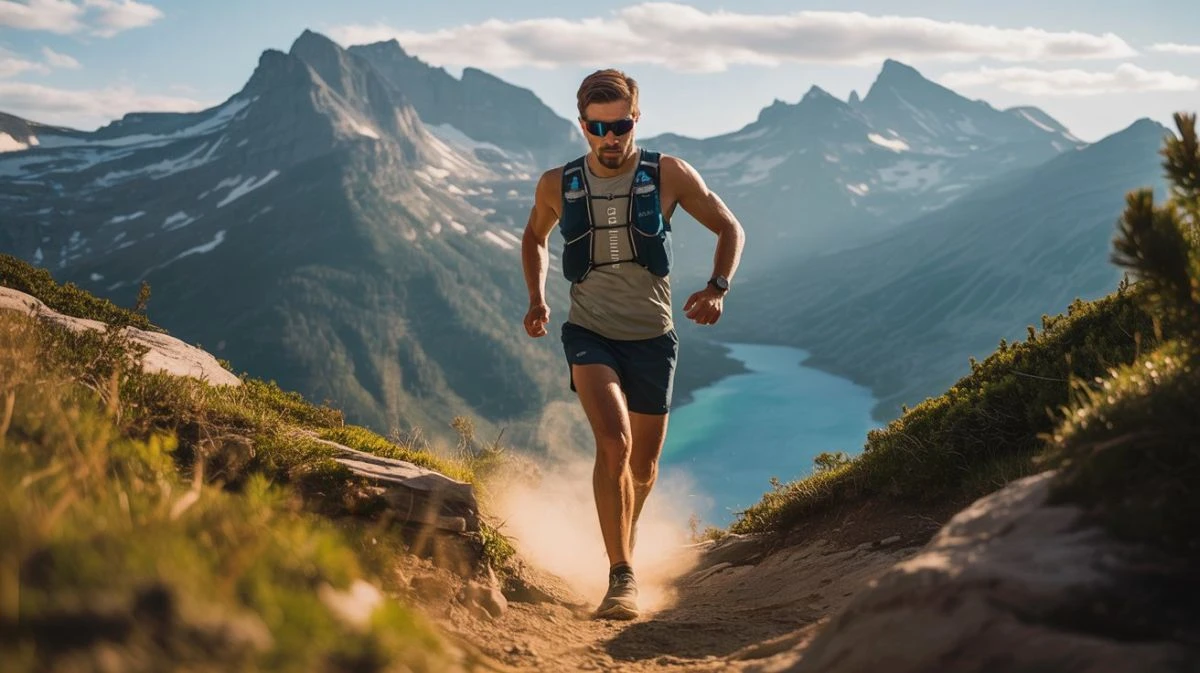
Trail Running
Running vests often combine a small hydration bladder (1–1.5 L) in the back and a soft-flask in the front, so the runner is balanced and can switch drinks (water in the back, electrolyte drink in the front). The slide closure has proven practical, as you can open it while running and an assistant at an aid station can throw in a handful of ice.
Tip: Also check out our range of water bottles. Besides classic everyday bottles, you'll find sports bottles made of soft plastic (soft flask), which are great for electrolyte drinks or gels and can be easily packed into a pocket when empty.
Cycling
The tube (bite valve) should reach about the upper part of the sternum – i.e., only 10–15 cm below the chin – so you can comfortably reach it even in an aerodynamic position, but at the same time, it doesn't dangle while pedaling. A magnetic holder on the strap keeps the tube within reach and doesn't interfere with most helmets. On the trail, a dust cover for the valve is also useful to prevent the mouthpiece from getting clogged with dirt.
Hiking
For multi-day treks, a two to three-liter bladder made of more durable TPU is worthwhile. When hiking in the sun, the number one enemy is UV rays – so carry the bladder in a textile cover.
Winter Sports
Ski tourers pour warm tea into the bladder in the morning. Silicone bladders can withstand >90 °C, while TPU only 80 °C. In the cold, tuck the tube under the jacket strap; body heat will delay freezing.
Tactical / Military
The coyote color and MOLLE pouch are not just for aesthetics – they protect the bladder from light and extend its lifespan.
What to Watch Out for in Practice
Before you set off on your first long trail, it's worth testing the hydration bladder at home or on a short walk first.
- Leak-proofness: Fill the bladder, turn it upside down, and place it on a dry paper towel. If the paper remains dry after five minutes, you're good to go.
- Tube length: Attach the valve to the shoulder strap and try to simulate a running arm swing. The tube should not dangle or constrict.
- Valve position: It should be within reach of your mouth without having to bend your head – ideally at the level of your collarbone.
- Backpack compatibility: The reservoir should not wobble too much in the sleeve or push out the back panel.
- Night test: Fill the bladder, place it on newspapers overnight. In the morning, you'll know immediately if it's leaking.
Care, Cleaning, and Maintenance – A Detailed Guide
Cleaning isn't rocket science, yet it's often forgotten. The following seven-step care will save you complaints and money:
- Immediately after activity, empty the bladder and rinse with warm water (not hot, if you have TPU).
- Fill with a solution of baking soda and lemon juice (1 L of water, 1 tablespoon of soda, juice of half a lemon), let it sit for 30 minutes.
- Rinse, open the valve, and let the solution flow through the tube.
- Using a brush, clean all walls – a rubber glove will prevent scratching the TPU.
- Unzip the top closure and insert a spacer – for example, a wooden spoon wrapped in a handkerchief.
- Dry in a shady, well-ventilated place (not in direct sunlight!).
- Once a year, treat the silicone with food-grade grease; your valve will thank you.
Tip: On the go, sugar-free mouthwash will suffice – it has antibacterial properties.
The Most Common Mistakes
- Sweet sodas in summer → sticky biofilm, mold, odor.
- Storing a closed bladder → residual water = odor.
- Too cold water in winter → the tube freezes in about 20 minutes.
- Underestimating compatibility → backpacks usually state compatibility with a certain volume of hydration bladder.
- Ignoring the expiration of cleaning tablets → lower effectiveness.
- Pulling the tube by the valve → if you pull the bladder out of the backpack by the valve, the plastic connector will gradually stretch, the seal will lose pressure, and eventually water will start to slowly drip from the tube.
FAQ – Frequently Asked Questions
- Can I put an electrolyte drink or cola in my hydration bladder?
Yes, but expect more frequent cleaning. Sweet drinks promote bacterial growth, and phosphoric acid can damage the seal. - How to remove the plastic taste?
Boil a solution of soda and lemon, or leave water with lemon slices or baking soda in it overnight. - Will the water in the hydration bladder freeze in winter?
At temperatures below −5 °C without insulation, probably yes. An insulating sleeve and warm water will help. - How often should I change the mouthpiece?
With intensive use (3 times a week), replace it after a year, otherwise once every 2–3 years. - Can I wash the bladder in the dishwasher?
Always follow the manufacturer's instructions. If you decide to use a dishwasher, set the maximum temperature to 45 °C and do without aggressive tablets. - What to do with a smelly tube?
Mix vinegar + water 1:4, rinse, and let it sit for 15 minutes. - Is there a difference between a women's and a men's hydration bladder?
Not in the bladder itself, but sports backpacks often have different straps and back lengths, which can affect the valve position.
Tip: Check out our range of women's sports backpacks! - Can a hydration bladder withstand sparkling water?
Short-term yes, but the gas increases pressure – there is a risk of dripping. We recommend filling with non-carbonated liquid. - How long does a silicone reservoir last?
With proper care, 8–10 years. - Can the tube be shortened?
Yes, cut off the excess and reattach the valve, ensuring a tight seal. However, we recommend measuring twice before cutting.
Glossary of Terms
- Bite valve – a silicone tip that you bite to start the flow of water.
- Quick-release – a quick connector between the tube and the bladder.
- Slide Closure – a slider that closes the roll-top opening.
Summary and Recommendations for Choosing a Hydration Bladder
A hydration bladder is a simple but essential piece of equipment that enhances performance and comfort on the go. The right reservoir volume for the length of the activity, a durable BPA-free material, and a well-fitting valve with a balanced flow are the three criteria that will most affect your experience. Equally important is compatibility with your backpack and regular maintenance, as a clean bladder means clean water and a healthier body.
Before buying, clarify how many hours you will be without a water source, in what temperatures you do sports, and how often you will be able to clean the bladder. A TPU reservoir offers the ideal balance of weight and durability for most recreational athletes, while silicone is the choice if you are heading into extreme cold or want maximum lifespan. Once you get used to your chosen model, give it a little care after each hike – in return, it will give you years of reliable service and eliminate thirst on the trail.


